Showing posts with label Chicken. Show all posts

Friday, December 28, 2018

Chicken Legs

Chicken Legs on Big Green Egg

Bought this nifty hanging rack off Amazon by Bayou Classics.


  1. Brine chicken legs, preferably overnight.
  2. Take out of brine, rinse, pat dry and put them back in the fridge for several hours to tighten back up
  3. Mix up a batch of flour and your favorite spices (salt, pepper, chili powder, paprika, etc)
  4. Lightly dust all sides of legs
  5. Recommend a drip pan with a little water in it
  6. Indirect setup, 400 degrees for approx 45 min to 1 hour


Tuesday, December 9, 2014

Buffalo Chicken Wings on Big Green Egg (with elevated grid)

I've found that these are one of the easiest things to do on the Egg.  I take the wings directly from the package and put on the hot Egg.  No sauce, no seasonings, no nothing.

Note:  I've done all types of pre-seasonings before.  Tony's, dry ranch powder, etc.  They're all fine, but the wing sauce is always so over powering, I never really taste anything else.

Using the Adjustable Rig on the highest setting, cook at about 350-400 on direct heat for about 15 minutes, flip wings and cook another 15 minutes.  Flip back to the original position and brush on your favorite sauce and cook for 5 minutes.  Flip again and brush on sauce on the other side, cook for 5 more minutes.  Remove from Egg and toss in a large bowl with more of the sauce.  Serve and enjoy.

The grid is several inches above the felt line when using this setup and the distance from the coals allows you to cook direct without charring.

Another alternative is a method I used to use before I had my Adjustable Rig.  I would setup the Egg with the place setter, legs up, for an indirect cook.  I would cook in this indirect setup for the first two 15 minutes parts listed above.  At that point I would remove the entire grate (with the food on it) and set it aside momentarily.  I would remove the hot place setter and set in a safe place.  I would then return the grate and food back to the Egg in a now a direct heat setup for last two 5 minutes sections of the cook listed above.


Thursday, December 19, 2013

Spatchcock Brick Chicken

When I learned about spatchcocking, I was fascinated.  It's a very odd word for basically cutting out the backbone of a bird and butterflying it (there are many YouTube videos describing this process).  It's surprisingly easy and it allows the chicken to be laid flat during cooking.  If you've ever cooked a whole bird, you know the challenge is constantly making sure the drum/thigh is fully cooked without over cooking the breasts (everyone always over cooks the breasts).  This method helps tremendously with this problem.

This cook is inspired by a special from Jim's Place Grill in Collierville, TN.  Much of my method is derived from asking their waiter how their brick chicken is prepared.  The purpose of the brick is two fold, it makes the skin crisper and it allows for a faster cooking time.  Jim's Place does a boneless presentation.  I'm not sure how in the hell they do that, but I can see how it would be possible because the meat is falling off the bone when using this method.

I've done this two ways, both at about 400 degrees

1)  In oven in cast iron skillet
2)  In Big Green Egg over direct heat

I will describe my BGE method.

  • Clean and remove the insides.
  • Spatchcock and brine the bird.  Brining consists of letting the meat "marinate" in a salt/sugar/water mix for a period of time.  This period of time can be from a couple of hours to overnight. (3/4 cup salt per gallon of water, same for sugar...even brown sugar can be used)
  • After brinning, add olive oil/rub and let the bird set out at room temperature for an hour, go easy on the salt if you brined it, otherwise it may be too salty.
  • Get your BGE going and stabilize at 400, clean off cooking grid and spray with oil/pam so the skin doesn't stick
  • Wrap a regular ol brick in tin foil (I let the brick heat up with the grill so it cooks from both sides)
  • Put bird on the grill, skin side down and place brick on top in the meatiest part and make sure it will stay put (approx 15 min)
  • Let it cook this way for 15 minutes to brown up the skin and remove brick (with heat glove) and place it on a heat resistant surface momentarily
  • Flip the chicken over (skin side up), replace the brick using the other side of the brick to avoid potential contamination (not sure this is required, just something I do)
  • Insert a meat thermometer and cook the rest of the way like this reaching internal temp of 160, which usually takes about another 30-40 minutes (I try to time it just right where I can shut down the BGE and cook it the rest of the way, like shutting it down at about 150.  It will keep that temp another 10 minutes easy to finish out the cook and save fuel)

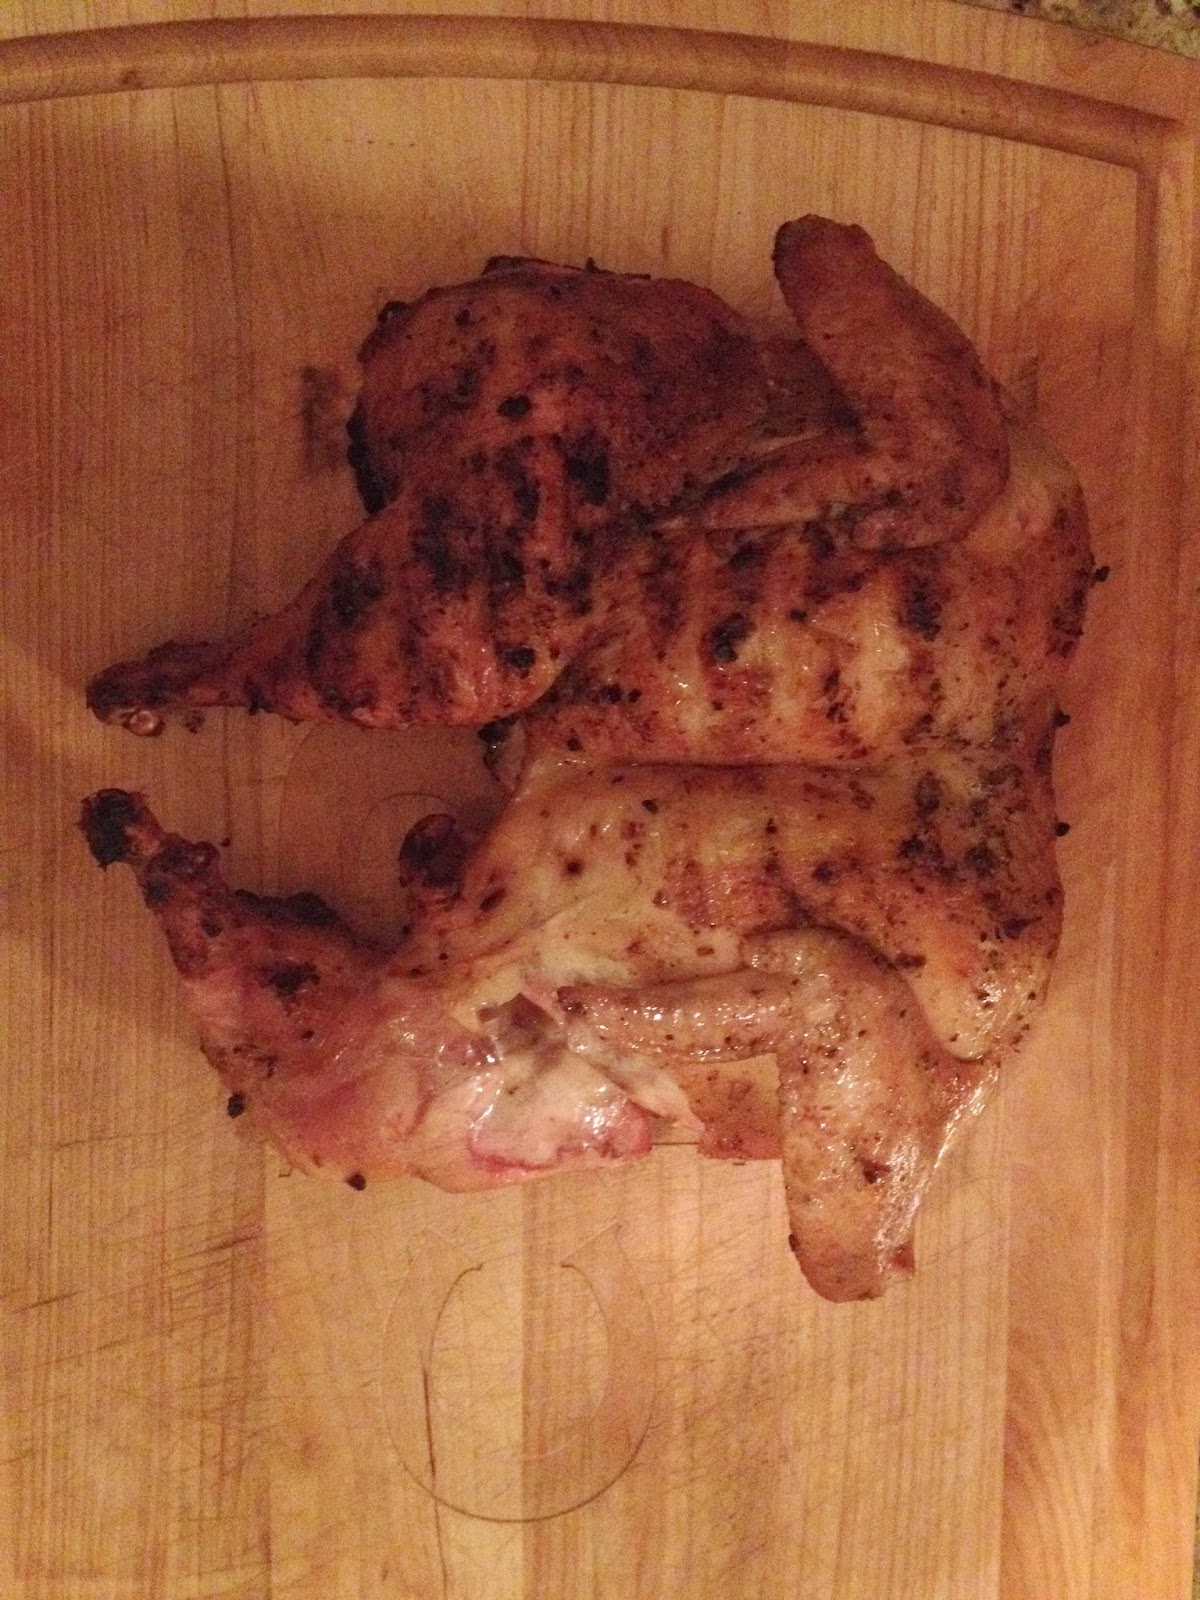
NOTE:  The pic below shows one that was left on for 20 minutes on first side.  It was slightly charred so that's why I backed it down to 15 minutes on first side.  You can see on the second pic as I try to pull the leg off, the drumstick just comes right out because it's so tender.


Here is one that is flipped after 15 minutes on the first side.  The skin is perfect.


Wednesday, November 6, 2013

Beer Can Chicken

One of my favorite easy cooks.  The name of this just sounds cool.  The whole idea is that beer gets to boiling and steams the meat from the inside out, while the heat from the grill is cooking from the outside.  I've been told you can use wine as well, however I have never tried it....maybe next time.

  • Get one whole chicken, remove insides, rinse off and pat dry
  • Apply olive oil and rub
  • Get a can of beer, drink half of it and insert it in your 'beer can chicken holder'
  • You can also put rub in the beer which helps a lot
  • Set chicken on beer where the whole can is literally inside of the body cavity of the bird
  • Pull when internal temp reaches about 160, usually takes about an hour cooking in the 400 degree range.
*Using a drip pan can be helpful, lined with foil for easy clean up.  Toss the can and foil, clean off the wire can holder and you're done!

Here is a picture of the chicken after I pulled it off the can:


Search This Blog